Procedure: Flash a custom Android image (ROM) to your X98 Air device, leaving Windows untouched
Required:
1. A Windows Host PC with the Manufacturing Flash Tool (MFT) installed and configured.
If you have a Windows PC, but need to install and configure the MFT, Try This Tutorial first.
2. Teclast X98 Air device with at least 50% battery charge
3. USB A to Micro USB cable
4. A downloaded Android ROM image that you intend to flash to your device. I would recommend downloading one ofMirek190’s fine ROMs from here:
Step by Step instructions:
1. Extract the ROM you will be installing to a folder on your Windows Host PC. I have selected Mirek’s V3 Lollipop image.
2. Launch the MFT using the desktop shortcut that looks like this:
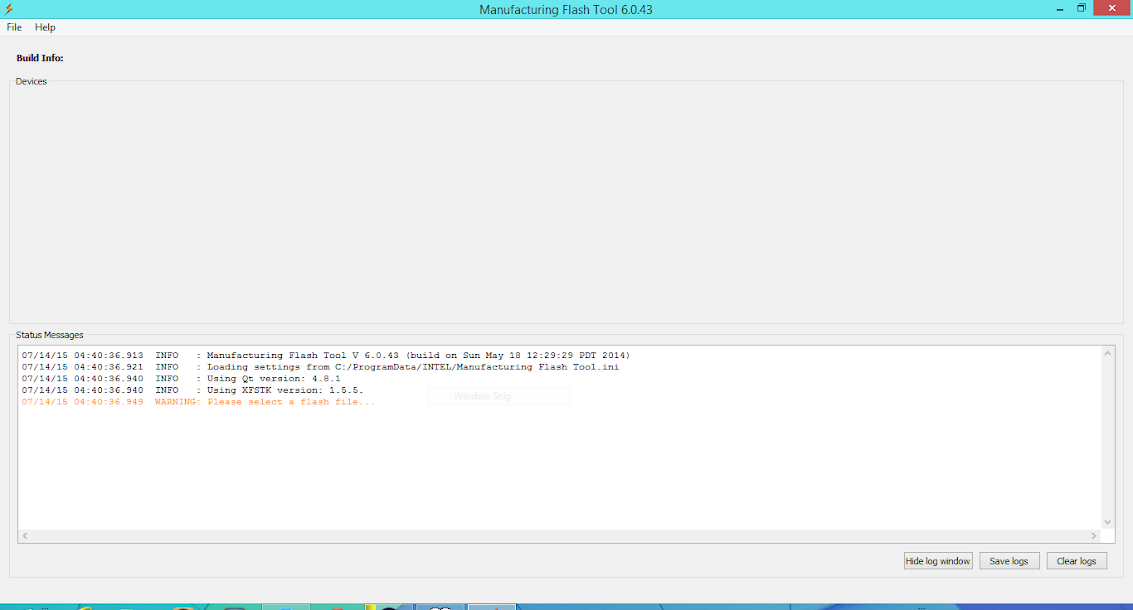
The MFT Application looks like this:

3 Within the MFT, select the File menu, then Open. This brings up the XML selector dialog, which looks like this:
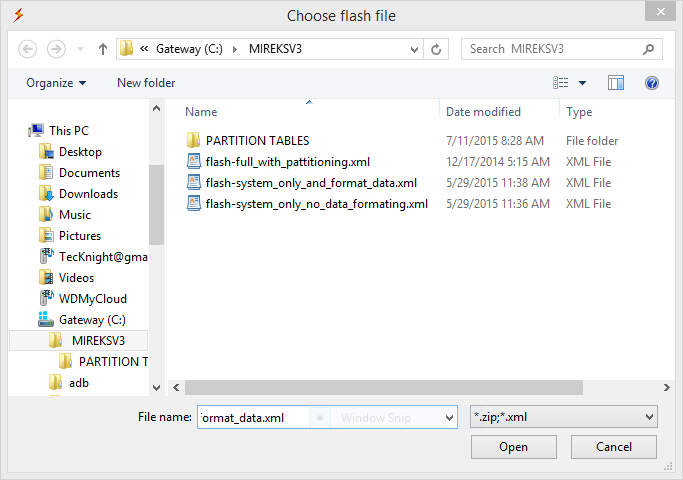
4. Using the MFT‘s XML selector dialog, browse to the folder containing your extracted ROM.
You should see the following options (wording may vary):
flash-full_with_partitioning
flash-system_only_and_format_data
flash-system_only_no_data_formating
We cannot select flash-full_with_partitioning, as this option deletes all existing partitions before repartitioning and flashing. This would not leave the Windows installation untouched. Both remaining options will leave Windows untouched, but have slightly different behavior.
flash-system_only_and_format_data is the recommended option for the cleanest Android install, but it does wipe any user settings and Apps you had installed before the flash. I’m used to starting from scratch and I want my Lollipop to be as clean of an install as possible, so I select this option using the XML selector dialog of the MFT. If I wanted to keep my settings and installed user apps, I could select flash-system_only_no_data_formating
MFT is now ready to flash. The flash will be triggered by the detection of a Baytrail device in DnX mode on the Host PC’s USB bus.

5. Connect the USB cable to the Host PC, but not to the tablet just yet.
6. Power up your X98 Air device by holding down the power button, volume+ and volume- until your device enters DnXmode. If you do it right, you will see:
Entering DnX mode
Waiting for Fastboot command
in small letters in the center of the display. DnX mode is a special provisioning mode, unique to Intel SoCs. The only software designed to communicate with a device in DnX mode is the Intel MFT.
7. Find a stable place to set down your X98 Air device, then connect the MicroUSB end of the USB cable to your device.
8. MFT should now detect your X98 Air device and immediately begin the flashing process. MFT will first send the tablet todroidboot mode, then it will flash the device using fastboot, displaying a progress bar indicating the percentage completed, like this:
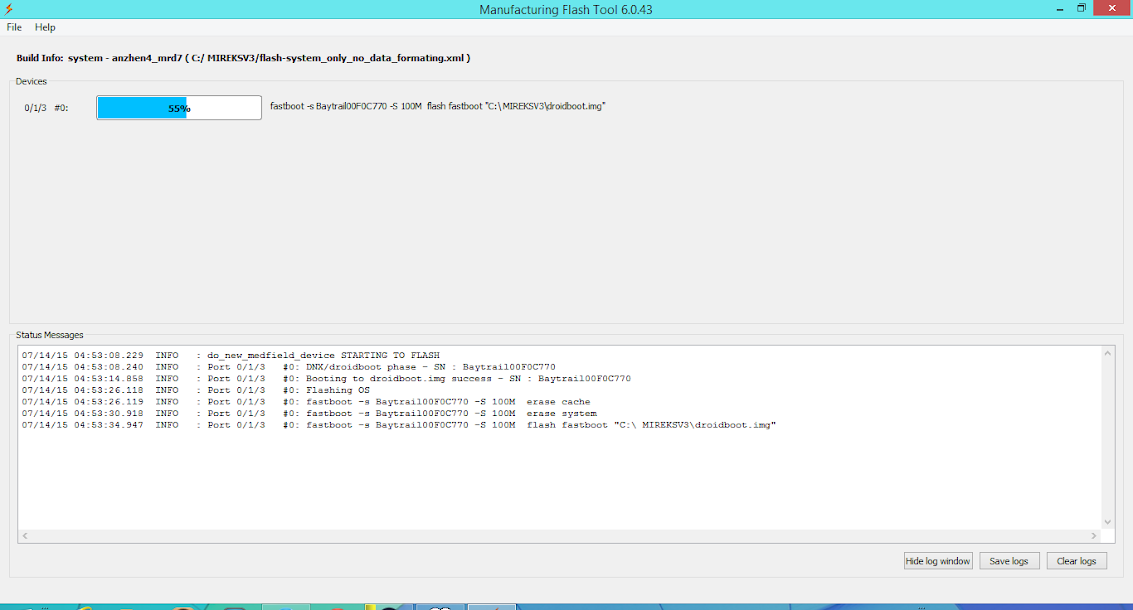
The progress bar might seem to hang at about 80%, but give it some time and it will complete.
9. Once the MFT indicates flashing is complete:
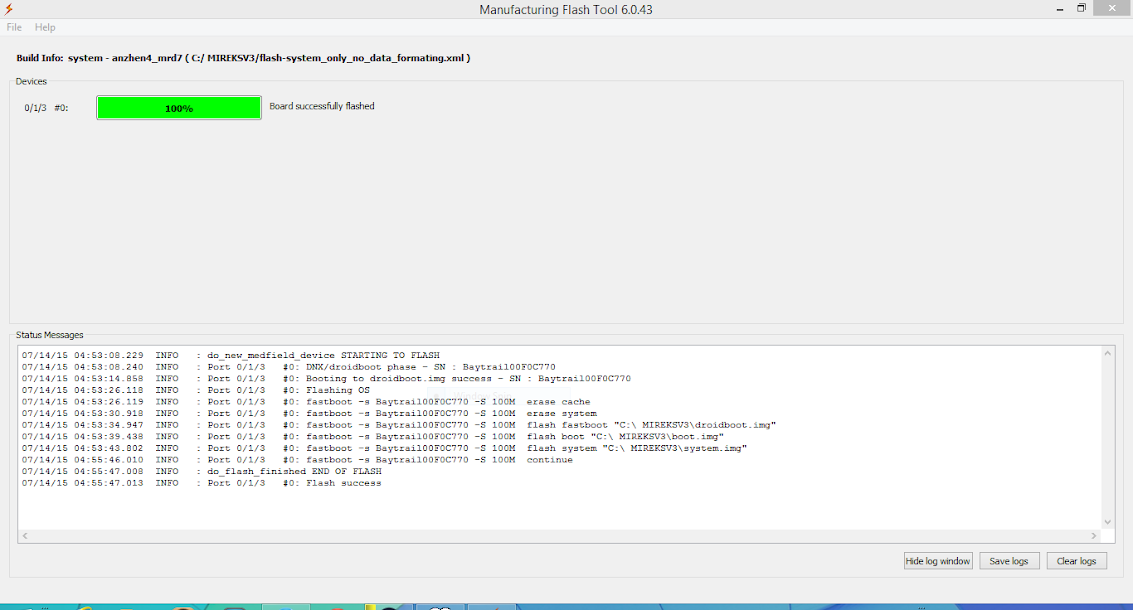
disconnect the USB cable from the tablet and Host PC.
10. Power up your tablet and boot into your new Android ROM !!