1. When you to open “android-ndk-r10c-darwin-x86_64.bin” with “Archive Utility.app” or other app.

2. Then you’ve got “android-ndk-r10c-darwin-x86_64.bin.cpgz”, OH! Crap it’s not extract but archive .bin to .cpgz extension.
Warning!! extracted file take more disk space up to 3.55 GB on disk
[Solution 1] recommended!!
1. open Terminal then type “chmod +x [path]/android-ndk-r10c-darwin-x86_64.bin” and press “Enter”, after that type only “[path]/android-ndk-r10c-darwin-x86_64.bin” and press “Enter” as below image.

1. open Terminal then type “chmod +x [path]/android-ndk-r10c-darwin-x86_64.bin” and press “Enter”, after that type only “[path]/android-ndk-r10c-darwin-x86_64.bin” and press “Enter” as below image.
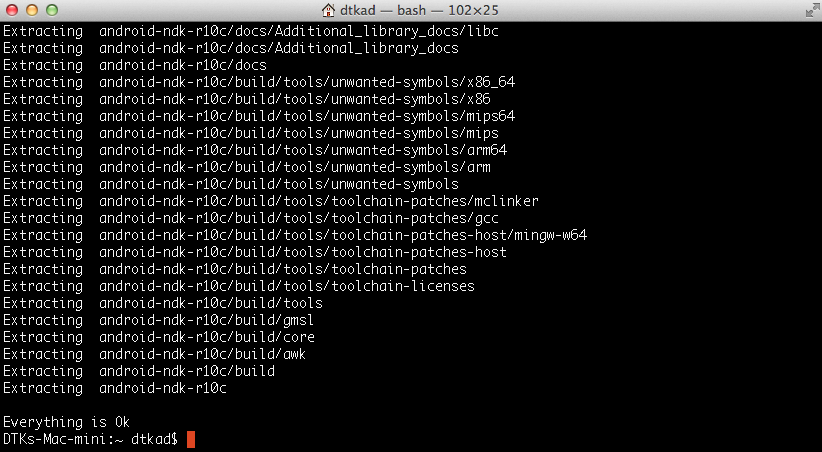
After that Terminal was extract with 7-Zip SFX, as below detail.

7-Zip SFX 9.20 Copyright (c) 1999-2010 Igor Pavlov 2010-11-18
p7zip Version 9.20 (locale=utf8,Utf16=on,HugeFiles=on,4 CPUs)
Processing archive: /Users/dtkad/Downloads/android-ndk-r10c-darwin-x86_64.bin
2. just wait process until Terminal show “Everything is Ok”
[Solution 2]
1. It’s too easy just rename by remove “.bin” if your non-extension file can be execute.
“android-ndk-r10c-darwin-x86_64.bin”
to
“android-ndk-r10c-darwin-x86_64”
you should see it’s as execute file, check it by right-click and choose “Get Info”, you will see detail like below image.

2. double click on “android-ndk-r10c-darwin-x86_64” execute file or open with “Archive Utility.app”, so if you not see “Archive Utility.app” in both Launchpad and Application folder, it should be here “/System/Library/CoreServices” like below image.

then the Terminal was run and execute file will do extract process, leave it run until it’s show message as below.
Everything is Ok
logout
[Process completed]

3. Let’s see your extracted folder “android-ndk-r10c”, it’s contain in “Users” by default, for example my users is “poraweeraksasin” from step 2. name on bar, see below image.
